Showing posts with label craft project. Show all posts

1.2.13

A Crafter's Guide: Fabric Flowers

 We have dubbed February the month of florals. 
The Paris Market will be offering up a beautiful array of fresh flowers for Valentines Day. Whether a bouquet or single stem, a selection of pretty petals will be available February 12th for purchase.

To start the month out in favor of the flower, how-to guru Jessie, has created a fabric flower DIY for all you crafty spirits. Don that creative cap, grab those scissors, and make you loved one something special this holiday!


Supplies Needed:

Card stock
Ruler
Poly-Blend Fabric
Fabric Pen
Scissors
Needle and Thread
Faux Pearls, Buttons, or Beads
Votive and Matches
Scissors


1. Cut a Series of 5 circles out of card stock in different sizes.
Dimensions:
Circle 1 - 1"
Circle 2 - 1 1/2"
Circle 3 - 2 3/4"
Circle 4 - 3.5"
Circle 5 - 4"


2. Trace circles onto fabric and cut out.


3. Cut five slits in each circle, leave at least 3/4" in the center.


4. Hold each edge over a lit votive and let the fabric slightly curl. Be careful not to hold your pieces too close to the flame as you just want the heat to lightly affect the fabric.


5. Stack each piece largest to smallest (largest on the bottom) and make a few stitches through the center to secure.


6. Decorate the center of your flower by stitching in a few pearls. Want a more crafty look? Try buttons or brooches to make your petals really stand out! 


La fin.

Use these unwilting creations to decorate a gift, add into a floral arrangement or sweeten up your style!


17.4.12

A Crafters Guide: Fabric Flag Cake Toppers!


 With our big Back in the Day Bakery book signing bash right around the corner, I have nothing but sweet treats on the brain. The cupcake craze has definitely hit us all hard and what better to add an extra dose of cuteness to these dream desserts, than with a fabric flag cake topper!


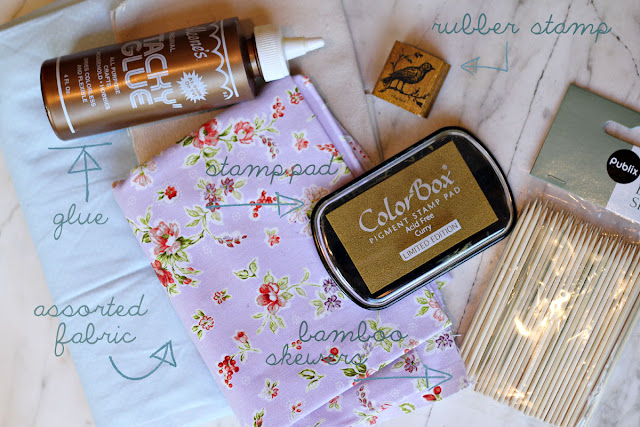
Supplies Needed!
Craft Glue
Assorted Fabric
Rubber Stamps
Ink Pad
 4 Inch Bamboo Skewers
Scissors
Colored Tape (Optional)


 Step One
Help your skewers pack a pretty punch by wrapping them with colored or patterned tape. I am just head over heels for the designs and colors we carry in the store. Its a good way to add some fun contrast to your fabric flags and provide a nice pop of color.


 Step Two
Trace a triangle onto a stiff piece of paper (this will act as your stencil). Trace around your stencil with an ink pen onto the back of you chosen fabric. Continue by cutting out your flag shapes.


 Step Three
Stamp your chosen designs onto your newly cut flags. Plan ahead by setting aside half of your cut out pieces. These will serve as the coordinating backs to each flag. Try stamping a cheerful message, a party theme, or the age of your special birthday someone.


 Step Four
Thoroughly coat the back of one of your plain flags with craft glue. Place your skewer against the flat edge of your triangle on top of the glue.


Step Five
Place your printed flag (right side up) on top of the glue covered flag, sandwiching the skewer in between the two. Let dry completely before placing on your cupcake.


Voila!
A perfectly printed topper for you next cupcake camp-out!
Join us April 26th from 5-7pm as we celebrate the much beloved Back in the Day Bakery and their new cookbook, with a book signing bash! 
See you there, and until then, Happy Crafting!
This is your craft loving how-to gal signing off!

xo, Jessica
visit me on my blog!